☁️ Mini Project Task 3 — Connecting the Edge Device to AWS IoT Core
Note
This task assumes you already have an AWS account set up — see Getting Started if you haven't done that yet.
3.0 — 🌿 Create a branch for this task
- On GitHub, in your fork, go to the branches page and click
New branch. Name ittask-3, create it frommain, and clickCreate new branch. - Open your cloned repository in VSCode.
- In a terminal, run
git fetchto make VSCode aware of the new branch. - Check out the new branch:
- On GitHub, in your fork, click on
Pull requests→New pull request. Setbase: mainandcompare: task-3. The description box will be pre-filled from the pull request template — skim it now, you'll fill it in as you go. - Click the dropdown arrow on the
Create pull requestbutton and chooseCreate draft pull requestinstead.
All the work for this task should be committed to the task-3 branch.
What to put in the pull request description
- Title:
Task 3 — Connecting the edge device to AWS IoT Core - Feature purpose: Authenticate the device to AWS IoT Core and prove it can exchange messages over a secure MQTT connection — the transport the rest of the system will run on.
- Feature architecture: A private key generated and held in the board's ECC508/608 crypto chip; a CSR signed by AWS IoT Core to produce an X.509 certificate, embedded in
secrets.h.handShakeProtocol()'s reset trigger becomes a TLS MQTT connection (viaArduinoBearSSL+ArduinoMqttClient) to the AWS IoT broker, publishing a test message on success. - Feature interfaces: The AWS IoT Core MQTT broker over TLS (port 8883); the
arduino/outgoingtopic; theFirstPolicyIoT policy scoping what the device's certificate is allowed to do. - Test plan: MQTT test client subscribed to
arduino/outgoing; pressing the button blinks the LED 3 times and a message appears in the test client on a successful connection, 9 times on failure (see 3.2, step 6). - Implementation roadmap: e.g. generate the CSR → create the AWS IoT thing, certificate, and policy → add the broker URL and certificate to
secrets.h→ implement the MQTT handshake → build & upload → verify via the MQTT test client.
Note
As with the earlier tasks, this breakdown is scaffolding to show you what feature planning looks like. For your group project, you'll be doing this planning yourselves — nobody hands you the purpose, architecture, interfaces, and test plan up front.
3.1 — ⚙️ Configure connectivity to AWS IoT Core
3.1.1 — 🔑 Create a CSR for a private key generated in an ECC508/ECC608 crypto chip slot
AWS IoT Core requires devices that connect using the MQTT protocol to use X.509 certificates for authentication. We'll use a sketch to generate a Certificate Signing Request (CSR) on the board and then upload this CSR in the AWS console to create an X.509 certificate.
-
Create a copy of
firmware/src/main.cpp(such asfirmware/backup/main.cpp).Danger
Do NOT store the copy in
firmware/src/. -
In
firmware/platformio.ini, make sure that the following is added to the list of dependencies:ArduinoECCX08
-
Replace the code in
firmware/src/main.cppwith the code from this GitHub repository.Warning
Don't upload the code to the Arduino yet!
-
In the PlatformIO extension, click on
Build. There should be an error message (there is a bug in the code which prevents compilation). Try and fix it so thatBuilddoesn't return an error. If you can't, use the solution at the end of this document.Tip
Look into function declaration vs. definition in C++.
-
Using
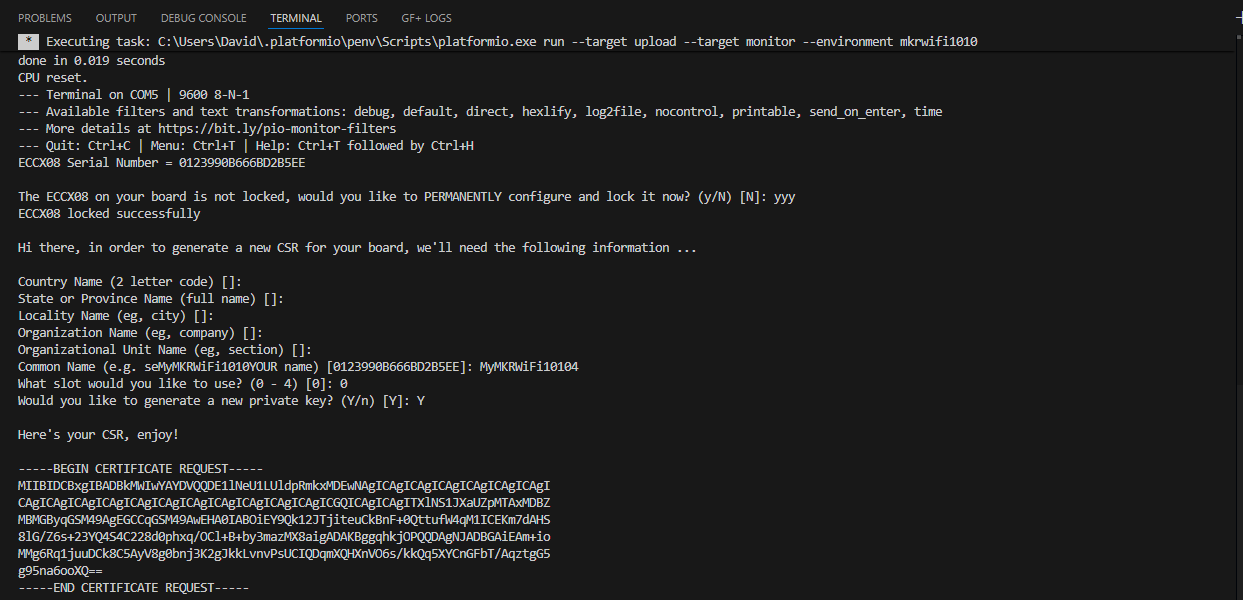
Upload and Monitorin the PlatformIO extension, upload the code to the Arduino. The Serial Monitor will prompt you for information to include in the CSR. Most entries can be left blank, except:- The "Common Name", which you can set to
MyMKRWiFi1010. - The slot number: try
0, if not available try1,2...
Danger
This locking process is permanent and irreversible, but is needed to use the crypto element — the configuration the sketch sets allows you to use 5 private key slots with any cloud provider (or server), and a CSR can be regenerated at any time for each of the other four slots.
- The "Common Name", which you can set to
-
Copy the generated CSR text including
-----BEGIN CERTIFICATE REQUEST-----and-----END CERTIFICATE REQUEST-----, and save it to a newcsr.txtfile.Danger
Make sure to save this file, but do not upload it to GitHub (it is bad practice — we use secrets instead).
3.1.2 — 🏷️ Create a thing in AWS IoT
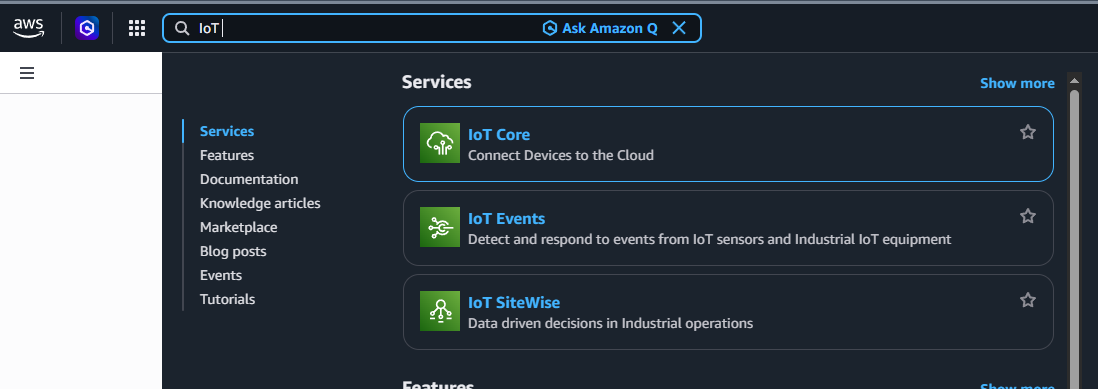
- Log into your AWS account, and using the search bar, open AWS IoT Core.
- In the left menu bar, click on
Manage→All devices→Things. - Click on
Create things, chooseCreate single thing, choose a name for your thing (such asMyMKRWiFi1010), leave all other fields as default, and click on next. - Select
Upload CSR, and upload thecsr.txtfile you created. - Click on
Create policy(it opens a new tab), name itFirstPolicy, then click onJSON, and paste the content ofinfra/policies/first_policy.json. Click onCreate. - Going back to the Thing tab, you should now see your policy in the list of policies. Tick the box to select it, and click on
Create thing. - In the left menu bar, click on
Manage→Security→Certificates. Click on the certificate you created, then click on:Actions→ActivateActions→Download(save this file)
- In the left menu bar, click on
Test→MQTT test client. Click on the dropdown menuConnection details, and copy the AWS IoT broker Endpoint URL.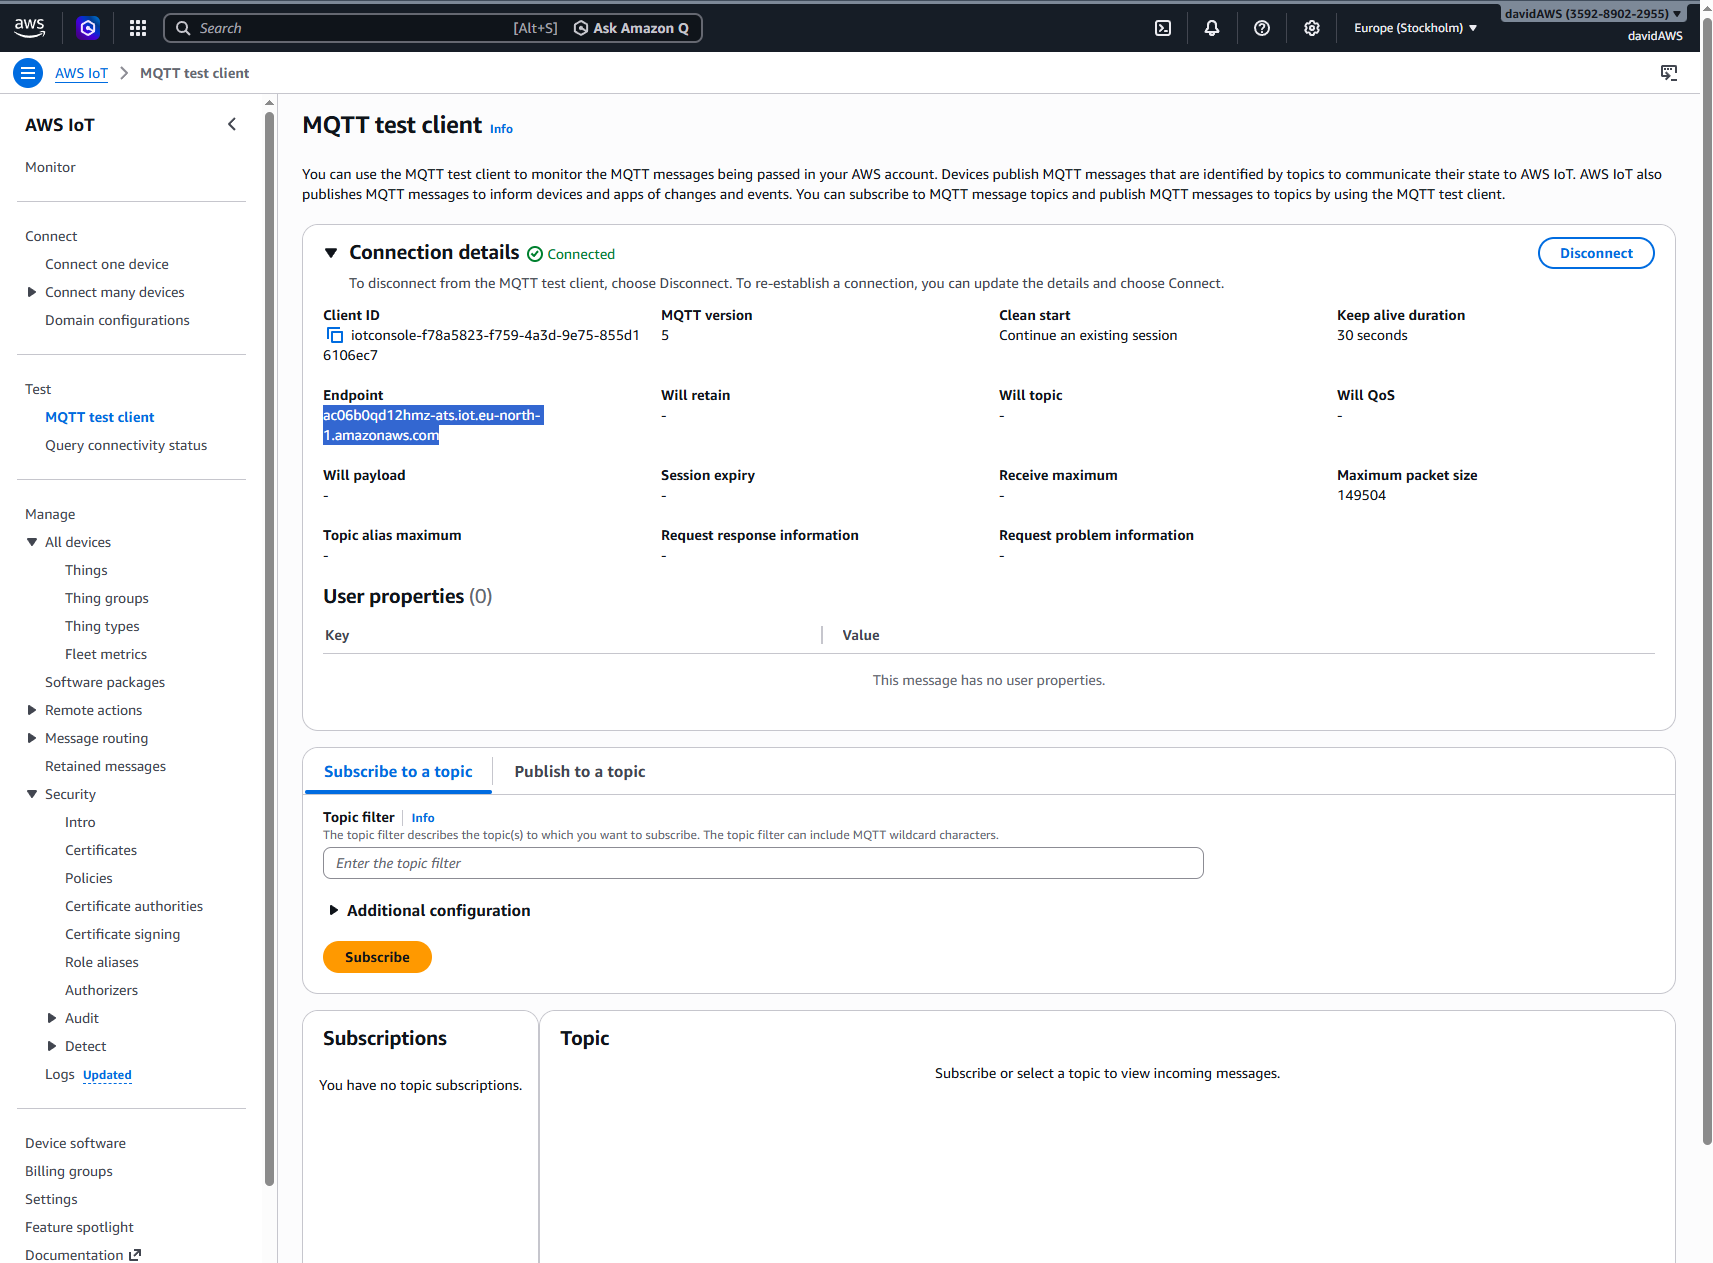
3.2 — 🔄 Update the firmware of the edge device to test connectivity to AWS IoT Core
sequenceDiagram
    box Edge Device
        participant PB as Push Button
        participant LED as LED
        participant MCU as Arduino (Firmware)

    end
    participant WIFI as WiFi Router
    box AWS Cloud
        participant IOT as AWS IoT Core (MQTT Broker)
    end


    MCU->>WIFI: WiFi.begin(SSID, PASSWORD)
    WIFI-->>MCU: Connected


    PB->>MCU: Button pressed
    MCU->>LED: Turn OFF
    MCU->>IOT: Attempt MQTT TLS connection\nport 8883

    alt Connection successful
        MCU->>IOT: MQTT CONNECT (TLS + X.509)
        IOT-->>MCU: CONNACK
        MCU->>IOT: Publish "hello..."\nTopic: arduino/outgoing
        MCU->>LED: Blink 3 times
    else Connection failed
        MCU->>LED: Blink 9 times
    end

MCU->>LED: Turn ON-
In the file
firmware/include/secrets.hyou created in Task 2, paste the following:// Fill in the url of your AWS IoT broker copied in task 3.1.2.8 #define SECRET_BROKER "xxxxxxxxxxxxxx.iot.xx-xxxx-x.amazonaws.com"// Fill in with the content of the file downloaded from AWS in 3.1.2.7 const char SECRET_CERTIFICATE[] = R"( -----BEGIN CERTIFICATE----- xxxxxxxxxxxxxxxxxxxxxxxxxxxxxxxxxxxxxxxxxxxxxxxxxxxxxxxxxxxxxxxx xxxxxxxxxxxxxxxxxxxxxxxxxxxxxxxxxxxxxxxxxxxxxxxxxxxxxxxxxxxxxxxx xxxxxxxxxxxxxxxxxxxxxxxxxxxxxxxxxxxxxxxxxxxxxxxxxxxxxxxxxxxxxxxx xxxxxxxxxxxxxxxxxxxxxxxxxxxxxxxxxxxxxxxxxxxxxxxxxxxxxxxxxxxxxxxx xxxxxxxxxxxxxxxxxxxxxxxxxxxxxxxxxxxxxxxxxxxxxxxxxxxxxxxxxxxxxxxx xxxxxxxxxxxxxxxxxxxxxxxxxxxxxxxxxxxxxxxxxxxxxxxxxxxxxxxxxxxxxxxx xxxxxxxxxxxxxxxxxxxxxxxxxxxxxxxxxxxxxxxxxxxxxxxxxxxxxxxxxxxxxxxx xxxxxxxxxxxxxxxxxxxxxxxxxxxxxxxxxxxxxxxxxxxxxxxxxxxxxxxxxxxxxxxx xxxxxxxxxxxxxxxxxxxxxxxxxxxxxxxxxxxxxxxxxxxxxxxxxxxxxxxxxxxxxxxx xxxxxxxxxxxxxxxxxxxxxxxxxxxxxxxxxxxxxxxxxxxxxxxxxxxxxxxxxxxxxxxx xxxxxxxxxxxxxxxxxxxxxxxxxxxxxxxxxxxxxxxxxxxxxxxxxxxxxxxxxxxxxxxx xxxxxxxxxxxxxxxxxxxxxxxxxxxxxxxxxxxxxxxxxxxxxxxxxxxxxxxxxxxxxxxx xxxxxxxxxxxxxxxxxxxxxxxxxxxxxxxxxxxxxxxxxxxxxxxxxxxxxxxxxxxxxxxx xxxxxxxxxxxxxxxxxxxxxxxxxxxxxxxxxxxxxxxxxxxxxxxxxxxxxxxxxxxxxxxx xxxxxxxxxxxxxxxxxxxxxxxxxxxxxxxxxxxxxxxxxxxxxxxxxxxxxxxxxxxxxxxx xxxxxxxxxxx= -----END CERTIFICATE----- )";Warning
This is the certificate you downloaded from AWS, not the CSR generated with the
ECCX08script.Warning
Make sure to leave no indentation or empty lines in the certificate — it would prevent successful authentication and connection to the broker.
-
Replace the content of
firmware/src/main.cpp(which contains the CSR generation script) with the copy you made earlier (containing the Arduino code for your edge device). - In
firmware/platformio.ini, make sure that the following are added to the list of dependencies:ArduinoMqttClientArduinoBearSSL
- Using this example, modify the edge device firmware so that when the button is pressed, if the Arduino successfully connects to the MQTT broker, it sends a message on the topic
arduino/outgoing, and makes the LED blink 3 times. Make the LED blink 9 times if the connection is unsuccessful. - In AWS IoT Core, in the left menu bar, click on
Test→MQTT test client. Subscribe to the topicarduino/outgoing. - Using the PlatformIO extension, build the code to check for errors, and upload to the edge device with
Upload and Monitor. Verify that:- The LED behaves as expected and blinks 3 times to indicate a successful connection.
- You see a message appear in the MQTT test client every time you press the button.
3.3 — 🔀 Submit the task for review
- Commit and push your changes to the
task-3branch — they show up automatically in your draft pull request. - Finish filling in the pull request description from the template (purpose, architecture, interfaces, test plan, roadmap).
- On the pull request page, click
Ready for reviewto take it out of draft. - Request a review from the course educator you added as a collaborator in Getting Started (click the gear icon next to
Reviewers). - Once the pull request is approved, click
Merge pull request→Confirm merge. - On GitHub, in your fork, click on
Releases(in the right sidebar of the repository home page) →Create a new release. ClickChoose a tag, typev3.0.0, and clickCreate new tag: v3.0.0 on publish. Make sureTargetis set tomain, then clickPublish release.
💡 Solutions for Task 3
firmware/platformio.ini
; PlatformIO Project Configuration File
;
;   Build options: build flags, source filter
;   Upload options: custom upload port, speed and extra flags
;   Library options: dependencies, extra library storages
;   Advanced options: extra scripting
;
; Please visit documentation for the other options and examples
; https://docs.platformio.org/page/projectconf.html

[env:mkrwifi1010]
platform = atmelsam
board = mkrwifi1010
framework = arduino
monitor_speed = 9600
lib_deps =
    WiFiNINA
    ArduinoECCX08
    ArduinoMqttClient
    ArduinoBearSSL
firmware/src/main.cpp (CSR generation script with fix)
/*
ArduinoECCX08 - CSR (Certificate Signing Request)

This sketch can be used to generate a CSR for a private key
generated in an ECC508/ECC608 crypto chip slot.

If the ECC508/ECC608 is not configured and locked it prompts
the user to configure and lock the chip with a default TLS
configuration.

The user is prompted for the following information that is contained
in the generated CSR:
- country
- state or province
- locality
- organization
- organizational unit
- common name

The user can also select a slot number to use for the private key
A new private key can also be generated in this slot.

The circuit:
- Arduino MKR board equipped with ECC508 or ECC608 chip

This example code is in the public domain.
*/

#include <ArduinoECCX08.h>
#include <utility/ECCX08CSR.h>
#include <utility/ECCX08DefaultTLSConfig.h>

String promptAndReadLine(const char* prompt, const char* defaultValue);
String readLine();

void setup() {
Serial.begin(9600);
while (!Serial);

if (!ECCX08.begin()) {
    Serial.println("No ECCX08 present!");
    while (1);
}

String serialNumber = ECCX08.serialNumber();

Serial.print("ECCX08 Serial Number = ");
Serial.println(serialNumber);
Serial.println();

if (!ECCX08.locked()) {
    String lock = promptAndReadLine("The ECCX08 on your board is not locked, would you like to PERMANENTLY configure and lock it now? (y/N)", "N");
    lock.toLowerCase();

    if (!lock.startsWith("y")) {
    Serial.println("Unfortunately you can't proceed without locking it :(");
    while (1);
    }

    if (!ECCX08.writeConfiguration(ECCX08_DEFAULT_TLS_CONFIG)) {
    Serial.println("Writing ECCX08 configuration failed!");
    while (1);
    }

    if (!ECCX08.lock()) {
    Serial.println("Locking ECCX08 configuration failed!");
    while (1);
    }

    Serial.println("ECCX08 locked successfully");
    Serial.println();
}

Serial.println("Hi there, in order to generate a new CSR for your board, we'll need the following information ...");
Serial.println();

String country            = promptAndReadLine("Country Name (2 letter code)", "");
String stateOrProvince    = promptAndReadLine("State or Province Name (full name)", "");
String locality           = promptAndReadLine("Locality Name (eg, city)", "");
String organization       = promptAndReadLine("Organization Name (eg, company)", "");
String organizationalUnit = promptAndReadLine("Organizational Unit Name (eg, section)", "");
String common             = promptAndReadLine("Common Name (e.g. server FQDN or YOUR name)", serialNumber.c_str());
String slot               = promptAndReadLine("What slot would you like to use? (0 - 4)", "0");
String generateNewKey     = promptAndReadLine("Would you like to generate a new private key? (Y/n)", "Y");

Serial.println();

generateNewKey.toLowerCase();

if (!ECCX08CSR.begin(slot.toInt(), generateNewKey.startsWith("y"))) {
    Serial.println("Error starting CSR generation!");
    while (1);
}

ECCX08CSR.setCountryName(country);
ECCX08CSR.setStateProvinceName(stateOrProvince);
ECCX08CSR.setLocalityName(locality);
ECCX08CSR.setOrganizationName(organization);
ECCX08CSR.setOrganizationalUnitName(organizationalUnit);
ECCX08CSR.setCommonName(common);

String csr = ECCX08CSR.end();

if (!csr) {
    Serial.println("Error generating CSR!");
    while (1);
}

Serial.println("Here's your CSR, enjoy!");
Serial.println();
Serial.println(csr);
}

void loop() {
// do nothing
}

String promptAndReadLine(const char* prompt, const char* defaultValue) {
Serial.print(prompt);
Serial.print(" [");
Serial.print(defaultValue);
Serial.print("]: ");

String s = readLine();

if (s.length() == 0) {
    s = defaultValue;
}

Serial.println(s);

return s;
}

String readLine() {
String line;

while (1) {
    if (Serial.available()) {
    char c = Serial.read();

    if (c == '\r') {
        // ignore
        continue;
    } else if (c == '\n') {
        break;
    }

    line += c;
    }
}

return line;
}
firmware/include/secrets.h
#define WIFI_SSID "xxxxxx"
#define WIFI_PASSWORD "xxxxx"

// Fill in the url of your AWS IoT broker copied in task 3.1.2.8
#define SECRET_BROKER "xxxx.iot.xx-xxxx-x.amazonaws.com"

const char SECRET_CERTIFICATE[] = R"(
-----BEGIN CERTIFICATE-----
xxxxxxxxxxxxxxxxxxxxxxxxxxxxxxxxxxxxxxxxxxxxxxxxxxxxxxxxxxxxxxxx
xxxxxxxxxxxxxxxxxxxxxxxxxxxxxxxxxxxxxxxxxxxxxxxxxxxxxxxxxxxxxxxx
xxxxxxxxxxxxxxxxxxxxxxxxxxxxxxxxxxxxxxxxxxxxxxxxxxxxxxxxxxxxxxxx
xxxxxxxxxxxxxxxxxxxxxxxxxxxxxxxxxxxxxxxxxxxxxxxxxxxxxxxxxxxxxxxx
xxxxxxxxxxxxxxxxxxxxxxxxxxxxxxxxxxxxxxxxxxxxxxxxxxxxxxxxxxxxxxxx
xxxxxxxxxxxxxxxxxxxxxxxxxxxxxxxxxxxxxxxxxxxxxxxxxxxxxxxxxxxxxxxx
xxxxxxxxxxxxxxxxxxxxxxxxxxxxxxxxxxxxxxxxxxxxxxxxxxxxxxxxxxxxxxxx
xxxxxxxxxxxxxxxxxxxxxxxxxxxxxxxxxxxxxxxxxxxxxxxxxxxxxxxxxxxxxxxx
xxxxxxxxxxxxxxxxxxxxxxxxxxxxxxxxxxxxxxxxxxxxxxxxxxxxxxxxxxxxxxxx
xxxxxxxxxxxxxxxxxxxxxxxxxxxxxxxxxxxxxxxxxxxxxxxxxxxxxxxxxxxxxxxx
xxxxxxxxxxxxxxxxxxxxxxxxxxxxxxxxxxxxxxxxxxxxxxxxxxxxxxxxxxxxxxxx
xxxxxxxxxxxxxxxxxxxxxxxxxxxxxxxxxxxxxxxxxxxxxxxxxxxxxxxxxxxxxxxx
xxxxxxxxxxxxxxxxxxxxxxxxxxxxxxxxxxxxxxxxxxxxxxxxxxxxxxxxxxxxxxxx
xxxxxxxxxxxxxxxxxxxxxxxxxxxxxxxxxxxxxxxxxxxxxxxxxxxxxxxxxxxxxxxx
xxxxxxxxxxxxxxxxxxxxxxxxxxxxxxxxxxxxxxxxxxxxxxxxxxxxxxxxxxxxxxxx
xxxxxxxxxxx=
-----END CERTIFICATE-----
)";
firmware/src/main.cpp (edge device code in task 3)
#include <Arduino.h>
#include <WiFiNINA.h>
#include "secrets.h"
#include <ArduinoBearSSL.h>
#include <ArduinoECCX08.h>
#include <ArduinoMqttClient.h>

/////// Enter your sensitive data in arduino_secrets.h
const char ssid[]        = WIFI_SSID;
const char pass[]        = WIFI_PASSWORD;
const char broker[]      = SECRET_BROKER;
const char* certificate  = SECRET_CERTIFICATE;

WiFiClient client;
BearSSLClient sslClient(client); // Used for SSL/TLS connection, integrates with ECC508
MqttClient    mqttClient(sslClient);

unsigned long lastMillis = 0;

// Pin definitions
const int buttonPin = 2;     // the number of the pushbutton pin
const int ledPin =  3;      // the number of the LED pin

// Status variables
int buttonState = 0;         // variable for reading the pushbutton status
int resetReceived = 0;       // variable for reading the reset status


// Function prototypes
void ledBlinkPatern(int pattern);
void handShakeProtocol();
unsigned long getTime();
void onMessageReceived(int messageSize) ;
void publishMessage();


// The setup function runs once when you press reset or power the board
void setup() {
    // initialize serial communication.
    Serial.begin(9600);
    // initialize the LED pin as an output.
    pinMode(ledPin, OUTPUT);
    // initialize the pushbutton pin as an input.
    pinMode(buttonPin, INPUT);
    // make sure the LED is on at the start
    digitalWrite(ledPin, HIGH);

    delay(5000); // Wait for 5 second to ensure the LED is on before connecting to WiFi
    Serial.println("Connecting to WiFi...");
    WiFi.begin(WIFI_SSID, WIFI_PASSWORD);
    while (WiFi.status() != WL_CONNECTED) {
    delay(500);
    Serial.print(".");
    }
    Serial.println("WiFi connected");

    if (!ECCX08.begin()) {
      Serial.println("No ECCX08 present!");
      while (1);
    }

    // Set a callback to get the current time
    // used to validate the servers certificate
    ArduinoBearSSL.onGetTime(getTime);

    // Set the ECCX08 slot to use for the private key
    // and the accompanying public certificate for it
    sslClient.setEccSlot(0, certificate);

    // Optional, set the client id used for MQTT,
    // each device that is connected to the broker
    // must have a unique client id. The MQTTClient will generate
    // a client id for you based on the millis() value if not set
    //
    // mqttClient.setId("clientId");

    // Set the message callback, this function is
    // called when the MQTTClient receives a message
    mqttClient.onMessage(onMessageReceived);

}

// The loop function runs over and over again forever
void loop() {

    buttonState = digitalRead(buttonPin);

    if (buttonState == HIGH && resetReceived == 0) {
        Serial.println("Button pressed, waiting for reset...");
        resetReceived = 1;
        digitalWrite(ledPin, LOW);
    }

    if (resetReceived == 1) {
        handShakeProtocol();
        delay(1000); // Add a delay to prevent the loop from running too fast after the handshake protocol is complete
    }


}

void ledBlinkPatern(int pattern) {
    /*************************************************************
    * This function is used to show the status of the LED.
    *
    * The pattern indicates how many times the LED will blink.
    * For example, if the pattern is 3, the LED will blink 3 times.
    **************************************************************/
    Serial.print("Status received:");
    Serial.println(pattern);
    for (int i = 0; i < pattern; i++) {
        digitalWrite(ledPin, HIGH);
        delay(500);
        digitalWrite(ledPin, LOW);
        delay(500);
    }
}

void handShakeProtocol() {
    /*************************************************************
    * This function is used to implement the handshake protocol between pressing the button and the reset of the LED.
    *
    * When the button is pressed, the LED will turn on and stay on until the reset is received.
    * Once the reset is received, the LED will turn off and the system will be ready for the next button press.
    * In task 1, the reset is triggered by waiting for an integer pattern to be sent through the serial monitor.
    * In task 2, the reset is triggered by waiting for an API call to check that the device is connected to the internet.
    * In task 3, the reset is triggered by waiting for an MQTT message that aknowledges that the device is connected to the MQTT broker.
    * In task 4, the reset is triggered by waiting for an MQTT message that sends a specific command to the device based on administrative rules defined in the cloud.
    **************************************************************/

    // TODO: YOUR CODE HERE
    Serial.println("Testing MQTT server connection...");
    lastMillis = millis();
    while (millis() - lastMillis < 10000) { // Wait for 10 seconds to receive the MQTT message
        if (mqttClient.connect(broker, 8883)) {

            break;
        }
        delay(100); // Add a small delay to prevent the loop from running too fast
    }
    if (mqttClient.connect(broker, 8883)) {
        Serial.println("MQTT server connection successful, sending hello message to broker.");
        mqttClient.beginMessage("arduino/outgoing");
        mqttClient.print("hello");
        mqttClient.print(millis());
        mqttClient.endMessage();
        ledBlinkPatern(3); // Blink the LED 3 times to indicate success
    } else {
        Serial.println("MQTT server connection failed.");
        ledBlinkPatern(9); // Blink the LED 9 times to indicate failure
    }
    digitalWrite(ledPin, HIGH); // Turn the LED back on after the handshake protocol is complete
    resetReceived = 0; // Reset the handshake protocol for the next button press
}

unsigned long getTime() {
  // get the current time from the WiFi module
  return WiFi.getTime();
}

void onMessageReceived(int messageSize) {
  // we received a message, print out the topic and contents
  Serial.print("Received a message with topic '");
  Serial.print(mqttClient.messageTopic());
  Serial.print("', length ");
  Serial.print(messageSize);
  Serial.println(" bytes:");

  // use the Stream interface to print the contents
  while (mqttClient.available()) {
    Serial.print((char)mqttClient.read());
  }
  Serial.println();

  Serial.println();
}

void publishMessage() {
  Serial.println("Publishing message");

  // send message, the Print interface can be used to set the message contents
  mqttClient.beginMessage("arduino/outgoing");
  mqttClient.print("hello ");
  mqttClient.print(millis());
  mqttClient.endMessage();
}